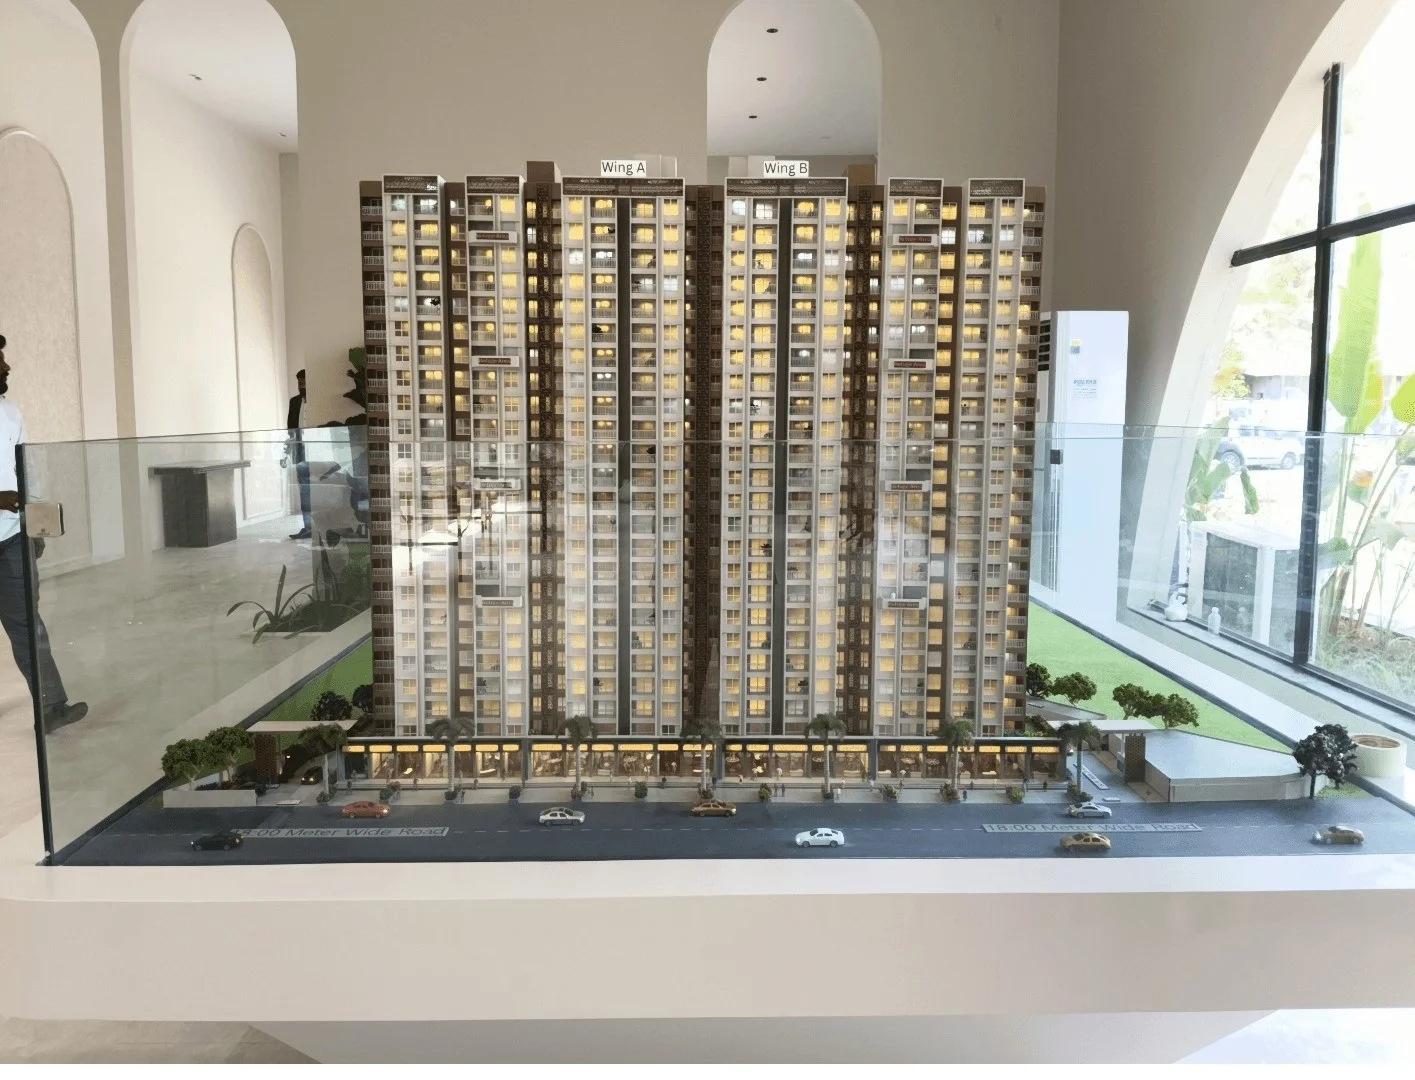
Clients who commission a model for the first time are often curious about what actually happens between handing over drawings and receiving the finished piece. Walking through the construction of a typical building scale model step by step demystifies the process and helps explain why quality studios charge what they do, and why cutting corners at any stage tends to show up clearly in the final result.
Step 1: Drawing Preparation and Scale Conversion
Everything starts with converting architectural drawings into fabrication-ready files at the correct scale. This involves stripping the drawing down to what’s actually needed for construction — wall lines, window openings, floor levels — and checking every dimension against the intended scale ratio. Mistakes made at this stage are the hardest and most expensive to fix later, so experienced studios spend real time here rather than rushing to the fun part of actually building.
Step 2: The Base and Structural Frame
A model needs a stable, level base before anything else goes on top of it, usually MDF or plywood for larger presentation pieces. The core structural frame of each building — floor plates and load-bearing walls in miniature — gets assembled next, typically from acrylic or foam board depending on the finish quality required. This structural stage determines whether the finished model will actually stay square and rigid over years of handling, or start to warp and sag.
Step 3: Facades and Fine Detailing
Once the core structure is solid, attention turns to facades — window frames, cladding patterns, balconies, architectural detailing — usually laser cut for precision and then hand-assembled and glued into place. This is where the model starts to actually resemble the building rather than just a boxy massing study, and it’s typically the most time-intensive stage of the entire build.
Step 4: Landscaping and Context
Roads, greenery, water features, vehicles and human figures get added to give the model context and scale reference. This stage matters more than clients often expect, a beautifully built tower sitting on a bare, empty base looks unfinished and lifeless, while thoughtful landscaping makes the whole piece feel alive and helps viewers instinctively judge scale correctly.
Step 5: Lighting, Final Painting and Quality Check
If the model includes interior or exterior lighting, wiring gets integrated before final assembly, tested thoroughly, and concealed so no wires are visible. A final painting and weathering pass smooths out any inconsistencies. Before delivery, most quality studios run a full inspection checking structural stability, finish consistency and packaging integrity, since a model that looks perfect in the workshop but arrives damaged has failed the client regardless of how good the craftsmanship was.
Common Mistakes That Undermine a Build
Even with a solid process, certain mistakes show up repeatedly across less experienced builds of a building scale model. Rushing the base and structural frame stage to get to the visually exciting facade work is a common one, and it almost always results in a piece that warps or sags within months. Skipping proper drawing verification at the very start is another, leading to proportional errors that only become obvious once the facade detailing is already underway and expensive to redo.
Poor material selection is a subtler mistake but just as damaging. Using a material that looks fine initially but yellows, warps or becomes brittle within a year means the client ends up with a model that ages badly, even if the initial delivery looked impressive. Experienced studios choose materials based on the model’s expected lifespan and handling conditions, not just on what looks good on delivery day.
What Clients Can Do to Help the Process
Clients play a real role in how smoothly this five-stage process goes. Providing complete, accurate drawings at the outset, responding promptly to clarifying questions, and consolidating feedback into single review rounds rather than a constant trickle of small changes all help a studio stay on schedule and deliver the quality they’re capable of. A rushed, chaotic brief tends to produce a rushed, chaotic build, no matter how skilled the workshop is.
How Long Each Stage Typically Takes
For a mid-size architectural piece, drawing preparation and scale conversion might take three to five days, the structural base and frame another week, facade and fine detailing anywhere from one to three weeks depending on complexity, landscaping a further few days, and final lighting, painting and quality checks another few days on top of that. These timelines compress or stretch considerably depending on scale and detail level, but having a rough sense of where the time actually goes helps clients understand why a seemingly simple request, like adding intricate balcony railings across an entire tower, can meaningfully shift a delivery date.
Studios that break down their timeline stage by stage, rather than just quoting a single delivery date, tend to make this kind of scheduling conversation much easier when changes come up midway through a project.
Signs the Process Is Being Done Right
As a client, you don’t need to be present in the workshop to gauge whether a build is on track. Regular progress photos at each stage transition, honest communication if something is taking longer than expected, and a willingness to explain material or technique choices when you ask are all good signs. Studios that go quiet for long stretches, or become defensive when asked simple questions about progress, are worth following up with sooner rather than later, since problems caught mid-build are almost always easier to fix than problems discovered at final delivery.
Ultimately, a transparent process and a well-constructed final model tend to go hand in hand. Studios that are confident in their own workmanship rarely have a reason to be cagey about how the work is progressing along the way, and it’s worth taking a bit of extra time upfront to find a team that communicates this way, since it makes the entire multi-week build far less stressful for everyone involved on the client side.
Conclusion
Each of these stages takes real time and skilled hands, which is exactly why a rushed or underpriced building scale model usually shows its shortcuts somewhere in the finished piece — a warped base, misaligned windows, or landscaping that feels like an afterthought. Understanding the process makes it much easier to judge whether a quote and timeline you’ve been given actually make sense.